
|
|
Deutsche Version |
| Home | |
| News | |
| Workshops | |
| Gallery | |
| Patterns | |
| Free Patterns | |
| Tips and Tricks |
|
| Links | |
| Contact About |
Tips and Tricks
Paperpiecing:
How to Shift and/or Rotate a Block Motif (09.11.2008)
If you would like to change the placement of a motif within the block - that's no problem at all. I'll use a simple tulip block as an example. Let's assume I want to move the flower a little bit to the right.
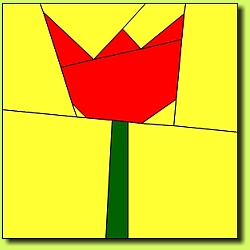
original pattern |
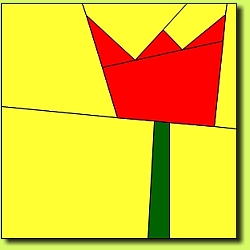
... moved to the right |
Since your foundation is always a mirror image of the finished block, you will need to mirror your adjustments. If, for example, the flower is supposed to shift to the right in the finished block, then in the foundation it must be shifted to the left.
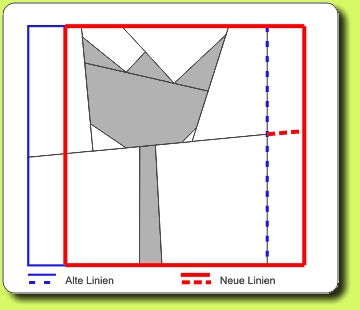
(The previous block edges are drawn in blue, new block edges are drawn in red.) Then, within the block the seam lines are extended to meet the new edges.
It is also helpful to make a clean copy of the new, adjusted block. That way the old lines won't confuse you while sewing.
Once you understand the basic principle you can also shift or rotate motifs in segmented blocks. For this you will need a drawing of the finished block. Cut out the foundation segments without seam allowances, then glue them to a fresh piece of paper as they would appear in a finished block.
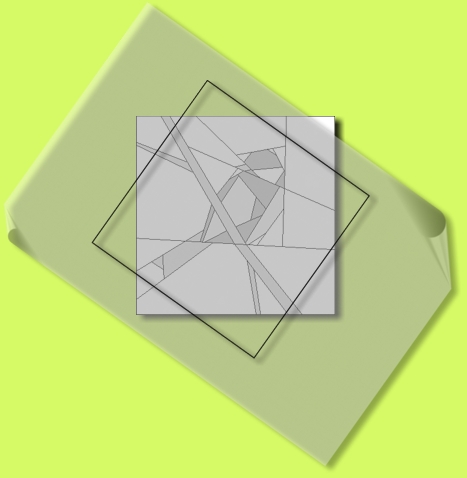
Draw a square the size of the finished block on a piece of baking parchment. Position this "frame" on top of the block drawing and shift it, until you like the new block composition. Trace the sewing lines and extend them to the edges of your parchment block - and voila, your new pattern is ready to use.
Last update: 10.02.2009